
An examination of fastener selection reveals that project success is frequently contingent upon the nuanced understanding and correct application of specific hardware components. This analysis, pertinent to the 2026 construction and fabrication landscape, deconstructs the five most prevalent errors made when choosing screws. It moves beyond superficial identification, probing the mechanical and chemical principles that govern the interaction between a fastener and its substrate. The discourse focuses on the critical distinctions between various screw types, including the drywall screw, chipboard screw, and the versatile self-drilling screw. By investigating the consequences of mismatched materials, misunderstood screw anatomy, improper sizing, neglected coatings, and flawed installation techniques, this guide provides a foundational framework for professionals and enthusiasts. The objective is to foster a deeper appreciation for the screw not as a mere commodity, but as a piece of precision-engineered hardware, thereby preventing structural failures, ensuring aesthetic integrity, and optimizing project efficiency within the demanding contexts of the United States, European, and United Kingdom markets.
In any project, whether it is the careful assembly of custom cabinetry or the framing of a new structure, we are surrounded by connections. These junctions, the points where materials meet and are held in place, are the silent bedrock of our built world. Their integrity is often entrusted to one of the most ubiquitous yet frequently misunderstood components in the entire catalog of building supplies: the screw. It is a piece of hardware so common that its complexity is paradoxically rendered invisible. We grab a handful from a box, drive them into place, and move on, rarely pausing to consider the immense engineering and specific purpose packed into that small, helical form. Yet, the choice of a screw is a decision laden with consequences. The wrong selection can transform a promising project into a source of perpetual frustration, manifesting as a sagging shelf, a creaking floor, a water-stained roofline, or, in the worst cases, a catastrophic structural failure.
This guide is born from an understanding of these high stakes. It is an attempt to cultivate a kind of empathy for the fastener, to see the world from its perspective. What forces will it be asked to endure? What materials must it conquer and then embrace? What environment will it inhabit for the next several decades? By asking these questions, we move from being mere users of hardware to becoming thoughtful practitioners. We begin to see the difference between a drywall screw, with its bugle head designed to dimple paper without tearing it, and a rugged hex head screw, built to clamp down roofing with unyielding force. We appreciate why a chipboard screw has a coarse, aggressive thread to bite into porous particle board, a task for which a fine-threaded machine screw would be utterly useless. This exploration is structured around five fundamental mistakes, not to chastise, but to illuminate the path toward better building. Each error represents a common gap in understanding, a place where a small shift in knowledge can yield a dramatic improvement in the quality, durability, and safety of our work. As we proceed, we will dissect the screw, examining its anatomy, its material composition, and the subtle language of its design, transforming it from a simple object into a subject of deep practical importance.
The most foundational error in fastener selection is a failure to properly consider the nature of the materials being joined. It is a cognitive shortcut, a moment where we assume "a screw is a screw" and that its only job is to hold two things together. This overlooks a fundamental truth: a screw does not simply hold things together; it becomes an integral part of a composite system. Its performance is inextricably linked to the properties of the substrate it penetrates. Using a fastener that is ill-suited to its host material is akin to speaking the wrong language; the message of "hold fast" is lost in translation, resulting in a weak, unreliable, and potentially dangerous connection. This mistake is not about malice, but about a lack of intimacy with the materials themselves. Let's cultivate that intimacy.
Imagine trying to nail jelly to a tree. The absurdity of the image highlights the core of the issue: the fastener and the substrate must be compatible partners. Each material possesses a unique density, grain structure, and composition that dictates how it will respond to a screw's intrusion.
A classic example of a mismatch is using a standard, coarse-threaded wood screw to fasten something to sheet metal. The wood screw is designed with deep, widely spaced threads. Its purpose is to displace and grip soft wood fibers. When you drive this screw into thin, hard metal, its threads can't effectively cut and tap a corresponding thread. Instead, they will likely strip the hole they create, resulting in virtually no holding power. The correct choice here would be a self-drilling screw or a sheet metal screw. These are designed with finer, harder threads specifically engineered to tap into metal, creating a secure, machine-like thread engagement. A self-drilling screw, for instance, has a specialized point that acts as a miniature drill bit, creating a perfectly sized hole just before the threads engage.
Conversely, consider the misuse of a fine-threaded screw, like a drywall screw designed for metal studs, in a piece of soft pine. The fine threads are designed for dense materials where a high thread count creates more surface area for friction and holding. In softwood, these delicate threads will have little to grip onto; the wood fibers are too far apart. The screw may spin out or provide deceptively weak pull-out resistance. The proper hardware for this job, a coarse-threaded wood screw or chipboard screw, would bite deeply into the wood, creating a far more robust connection.
The world of hardware offers a specific solution for nearly every application. A visit to a supplier of industrial hardware reveals this immense variety. There are concrete screws with specialized high-low threads and a hardened body to cut into masonry, and there are chipboard screws with unique properties for gripping the resin-and-particle composite of MDF and particle board. The first step in avoiding this mistake is to pause and identify the materials you are joining. Is it wood to wood? Drywall to metal stud? Metal to metal? This simple identification is the first filter that narrows down your choice of hardware from thousands to a manageable few.
| Screw Type | Drywall to Wood Stud | Drywall to Metal Stud | Particle Board/MDF | Sheet Metal to Metal | Wood to Wood | Attaching to Concrete |
|---|---|---|---|---|---|---|
| Coarse-Thread Drywall Screw | Ideal | Not Recommended | Poor | Not Recommended | Acceptable | Not Recommended |
| Fine-Thread Drywall Screw | Poor | Ideal | Poor | Not Recommended | Poor | Not Recommended |
| Chipboard Screw | Poor | Poor | Ideal | Not Recommended | Good | Not Recommended |
| Self-Drilling Screw | Not Recommended | Good | Not Recommended | Ideal | Poor | Not Recommended |
| General Wood Screw | Acceptable | Not Recommended | Poor | Not Recommended | Ideal | Not Recommended |
| Concrete Screw (e.g., Tapcon) | Not Recommended | Not Recommended | Not Recommended | Not Recommended | Not Recommended | Ideal |
Once you have matched the screw type to the material, the next layer of consideration is the nature of the force the fastener must resist. In mechanics, we primarily speak of two types of loads: tensile (or pull-out) force and shear force.
Imagine a screw holding a picture frame to a wall. The weight of the frame is pulling the screw straight down, parallel to the wall surface. This is a shear load. The screw is acting like a tiny, embedded pin, and its ability to resist this force depends on the strength of the steel it's made from and its diameter. A thicker screw will have a higher shear strength.
Now, imagine that same screw is holding a plant hanger from the ceiling. The weight of the plant is pulling the screw straight out of the ceiling, perpendicular to the surface. This is a tensile load. The screw's ability to resist this pull-out force depends almost entirely on the engagement of its threads with the substrate material. The type of thread, the depth of embedment, and the integrity of the substrate are the governing factors.
This distinction is not merely academic; it has profound real-world implications. A standard drywall screw, for example, is made from relatively brittle, case-hardened steel. It has excellent tensile strength for its size, which is why it's great at holding drywall sheets snug against studs. However, its brittle nature gives it poor shear strength. You should never use a drywall screw to hang something heavy like a cabinet or support a structural load. A shear force could cause the screw to snap cleanly. For such applications, a structural screw or a lag screw is required. These are made from tougher, more ductile steel that can bend under a shear load without fracturing, and they have a larger diameter to provide the necessary strength. You can often find detailed specifications on shear and tensile strengths from manufacturers of quality hardware (Forest Products Laboratory, 2021).
When selecting a fastener, ask yourself: what is the primary direction of the force? Is this application structural? A hex head screw used for framing or decking is chosen for its high shear strength. A self-drilling screw used to attach metal panels is chosen for its ability to create a tight, pull-out resistant connection. Understanding the load is a vital step in choosing hardware that is not just adequate, but safe.
The final piece of the application puzzle is the environment. A screw that performs flawlessly indoors may fail in a matter of months when exposed to the elements. The primary enemy here is corrosion.
Corrosion is an electrochemical process where a refined metal, like the steel in a screw, attempts to revert to its more stable, natural state, such as iron oxide—or rust. This process is massively accelerated by the presence of an electrolyte, which is most commonly water. For projects exposed to moisture, rain, high humidity, or coastal salt spray, choosing the right corrosion-resistant hardware is not optional; it is paramount.
The most basic level of protection is a zinc coating (galvanization). Zinc is more reactive than steel, so it acts as a sacrificial layer. It will corrode first, protecting the steel underneath. However, not all zinc coatings are equal. A thin, shiny "electro-galvanized" finish is suitable for damp, but not wet, conditions, like a bathroom or basement. For outdoor use, a hot-dip galvanized coating is far superior. This process involves dipping the screw in molten zinc, creating a much thicker, more durable, and more protective layer.
In highly corrosive environments, such as coastal areas or in applications using certain types of treated lumber (which can contain corrosive chemicals), even hot-dip galvanization may not be enough. This is where stainless steel hardware becomes the material of choice. Stainless steel is an alloy of steel, chromium, and often nickel. The chromium forms a passive, invisible layer of chromium oxide on the surface that instantly reforms when scratched, providing exceptional corrosion resistance. While more expensive, the longevity of stainless steel in harsh environments makes it a wise investment.
Temperature fluctuations can also affect hardware performance. Extreme cold can make some metals more brittle, while expansion and contraction from temperature swings can cause fasteners to loosen over time. In applications with wide temperature variations, using a screw with a washer head or an integrated rubber washer (common on a roofing hex head screw) can help to accommodate this movement and maintain a tight seal. By thinking through the material, the load, and the environment, you transform a simple choice into a sophisticated engineering decision, ensuring your project's integrity for years to come.
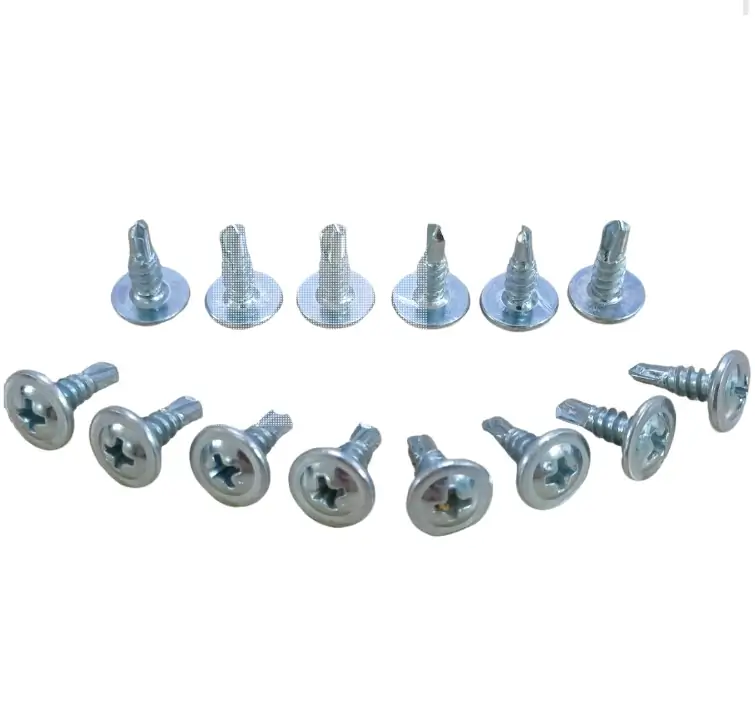
To the untrained eye, most screws look roughly the same: a head, a shank, and a pointy end. This simplistic view is the source of the second major mistake in fastener selection. It is a failure to appreciate that every feature of a screw—the shape of its head, the pitch of its threads, the design of its point—is the result of a deliberate engineering choice aimed at solving a specific problem. Understanding this anatomy is like learning to read a language. It allows you to look at a piece of hardware and understand its intended purpose, its strengths, and its limitations. When we ignore these details, we are essentially guessing, hoping that the screw we've chosen possesses the right characteristics for the job. A more methodical approach yields far better results.
The head of a screw has two primary jobs: to provide a surface for a tool to engage and drive the screw, and to exert force on the material surface once driven. The shape of the head is tailored to this second job.
Consider the bugle head found on a drywall screw. Its unique, concave, bugle-like shape is a marvel of specific design. It is engineered to drive just below the surface of the drywall paper without tearing it. This creates a small "dimple" that can be easily filled with joint compound for a perfectly smooth, invisible finish. If you were to use a screw with a flat-bottomed head, like a pan head, it would likely tear the paper, compromising the finish and the screw's holding power. This is a clear instance where specialized hardware from dedicated specialized drywall screw suppliers is non-negotiable for a professional result.
A pan head or truss head (a wider, lower-profile pan head) is designed to sit on top of the material surface. Its large bearing surface is ideal for securing thin materials like sheet metal or plastic, where a countersinking head might pull through entirely.
The countersunk or flat head is designed to finish flush with or just below the material surface. This is common for general woodworking and applications where a protruding head would be an obstruction or aesthetically displeasing. The angled underside of the head helps to center the screw in its hole and provides excellent clamping force.
Then there is the robust hex head. As its name implies, it has a hexagonal head that is driven with a wrench or socket. This design allows for the application of much higher torque than a standard screwdriver slot, making it the go-to choice for heavy-duty applications like lag screws for framing, structural screws, or the ubiquitous hex head self-drilling screw used for fastening metal roofing and cladding. Many roofing screws also incorporate a built-in washer, often with a rubber or EPDM seal, to create a weatherproof connection. Each head style tells a story about the screw's intended function.
| Head/Drive Type | Visual Description | Primary Use Case | Advantages | Disadvantages |
|---|---|---|---|---|
| Bugle Head | Countersunk with a curved, bugle shape under the head. | Attaching drywall. | Prevents tearing of drywall paper, creates a perfect dimple for mud. | Not suitable for structural loads. |
| Pan Head | Flat top with rounded sides, flat bearing surface. | General assembly, attaching thin materials (metal, plastic). | Good clamping on the surface, common and versatile. | Protrudes from the surface. |
| Flat Head (Countersunk) | Flat top with a cone-shaped bearing surface (typically 82° or 90°). | General woodworking, cabinetry, where a flush finish is needed. | Sits flush with the material, provides good centering and clamping. | Requires a countersunk hole for a flush fit in hard materials. |
| Hex Washer Head | Hexagonal head with an integrated circular flange (washer). | Metal-to-metal fastening, roofing, framing. | Allows high torque application, large bearing surface distributes load. | Requires a wrench or socket; bulky appearance. |
| Phillips Drive | Cross-shaped recess. | General purpose fastening of all types. | Self-centering, very common. | Prone to "cam-out" (driver slipping out) under high torque. |
| Torx/Star Drive | Six-pointed star-shaped recess. | Decking, structural screws, high-torque applications. | Excellent torque transfer, highly resistant to cam-out and stripping. | Less common bits, though gaining popularity. |
If the head is the screw's face, the thread is its soul. The threads are the helical ridges that do the actual work of pulling the screw into the material and resisting pull-out forces. The two most fundamental variations are coarse thread and fine thread.
Coarse threads have a steeper angle and are spaced further apart. Think of them as having a more aggressive "bite." They are the standard for softer materials like softwood (pine, fir), particle board, and plastic. The wide spacing allows them to grab and hold large chunks of the soft material. Driving a coarse-threaded screw is also faster, as it advances further with each rotation. The common chipboard screw is a perfect example; its very coarse, deep threads are designed specifically to get a tenacious grip in the composite of wood chips and resin that makes up particle board.
Fine threads have a shallower angle and are packed more closely together. They are used for harder materials like hardwoods (oak, maple) and metal. In hardwoods, coarse threads can be too aggressive and may tear the wood fibers, weakening the connection. The higher number of fine threads creates more surface area contact within the dense wood, increasing holding power through friction. In metal, a fine thread is essential for creating a strong, tapped hole. A self-drilling screw designed for steel will always have a fine thread. The difference is also critical for drywall screws. A coarse-threaded drywall screw is for wood studs, while a fine-threaded drywall screw is for metal studs, providing a better purchase in the dense, thin steel.
Some screws even feature specialized threads. A "high-low" thread, often seen on screws for plastic or masonry, alternates between a high, sharp thread and a lower, smaller thread. The high thread cuts the material, while the low thread increases pull-out resistance and helps prevent stripping. Understanding the logic of thread pitch allows you to select a piece of hardware that will grip its host material with maximum efficiency.
The point of the screw is what initiates the connection. Its design determines whether a pilot hole is needed and how easily the screw will start and drive.
The most basic is a sharp point, found on standard wood screws and drywall screws. It is designed to pierce the material surface and help the threads begin to engage. For softwoods and drywall, this is often sufficient, but in hardwoods, a pilot hole is almost always recommended to prevent the wood from splitting.
A self-tapping point (often called a Type A, B, or AB point) is more advanced. It features a cutting flute or a sharper, more defined point designed to displace material and form its own thread in a pre-drilled hole, particularly in sheet metal or plastic. This differs from a standard wood screw, which primarily displaces fibers rather than cutting a clean thread.
The most sophisticated is the self-drilling point, often referred to by the trade name Tek® point. This is the defining feature of a self-drilling screw. The point is essentially a miniature drill bit, complete with cutting edges and flutes to clear away material (swarf). The length of this drill point is numbered (e.g., #1 through #5), with higher numbers indicating a longer flute capable of drilling through thicker gauges of metal. A self-drilling screw accomplishes three actions in one: it drills a hole, taps a thread, and fastens the materials. This makes it an incredibly efficient piece of hardware for metal framing, roofing, and cladding applications. Using a self-drilling screw eliminates the entire step of pre-drilling, saving immense time and labor on a job site.
By deconstructing the screw into these three key anatomical parts—head, thread, and point—we can move beyond a superficial glance. We can assess a piece of hardware and make an informed judgment about its capabilities, ensuring that the fastener we choose is not just a placeholder, but the perfect component for the task at hand.
After carefully considering the material and the screw's specific design, a new potential for error emerges in the dimensions of the hardware itself: its diameter (gauge) and its length. It is tempting to adopt a "bigger is better" mentality or, conversely, to simply grab what is "close enough" from the box. Both approaches are flawed. The size of a screw is not arbitrary; it is a critical variable that directly impacts the strength, integrity, and finish of the connection. Selecting the wrong size can lead to a host of problems, from a split workpiece to a connection so weak it fails under load. Precision is not a luxury here; it is a requirement for quality work.
The diameter of a screw, often referred to as its gauge or shank diameter, is directly proportional to its strength, particularly its shear strength. As we discussed earlier, shear strength is a fastener's resistance to being snapped by forces acting parallel to the material surface. A thicker screw is, quite simply, harder to break.
Imagine you are building a deck. The joists are held to the ledger board with fasteners, and the weight of the deck, plus everyone on it, is trying to shear those fasteners. Using an undersized screw, like a thin #6 gauge screw, would be dangerously inadequate. The load could easily exceed the screw's shear capacity, leading to a catastrophic failure. This is an application that calls for a thick, robust fastener, such as a #10 or #14 gauge structural screw or a large-diameter lag screw. The difference in shear strength between a #8 screw and a #10 screw is significant, and it is a specification that engineers and builders take very seriously. Reputable manufacturers provide detailed engineering data for their structural hardware, listing shear and tensile values that should be consulted for any load-bearing application (Bickford, 2007).
However, a larger diameter is not always better. In delicate work, or when fastening near the edge of a piece of wood, a screw with too large a diameter can act like a wedge, forcing the wood fibers apart and causing the material to split. This is especially true in hardwoods or brittle materials. In such cases, a smaller-gauge screw, often paired with a pilot hole, is the more prudent choice. The key is to choose a diameter that provides the necessary strength without overpowering and damaging the substrate. A good rule of thumb is to use the largest gauge screw that the material can comfortably accommodate without splitting.
When browsing options, such as when exploring hardware options from a specific supplier, pay close attention to the available gauges for the screw type you need. The range of diameters offered is a clue to the fastener's intended applications, from fine-gauge screws for finish work to heavy-gauge screws for structural connections.
If diameter relates to strength, length relates to grip. The pull-out strength of a screw is almost entirely a function of how much of its threaded length is engaged in the substrate material. A screw that is too short will not have enough grip to form a secure connection. A screw that is too long can be wasteful, difficult to drive, or worse, can poke through the other side of the workpiece, creating a hazard and an aesthetic blemish.
For fastening wood to wood, a widely accepted rule of thumb is that the screw should penetrate the bottom piece of wood (the piece being fastened to) by at least two-thirds of its thickness. For example, if you are attaching a 3/4-inch (19mm) board to a 1.5-inch (38mm) joist, your screw should penetrate the joist by at least 1 inch (25mm). Therefore, the minimum screw length would be 1 inch (for the joist) + 3/4 inch (for the board) = 1.75 inches. A 1.75-inch or 2-inch screw would be appropriate. This ensures enough of the threads are engaged in the main structural member to provide robust holding power.
When fastening to metal, the calculation changes. For a self-drilling screw or self-tapping screw in steel studs or sheet metal, the important factor is ensuring that at least three full threads extend past the material being fastened. This guarantees full thread engagement and maximum holding power in the thin metal.
Choosing the correct length is particularly important for a chipboard screw. Particle board and MDF have relatively poor holding power compared to solid wood. Using a screw that is too short will result in a weak joint that can easily pull out. It is crucial to use a screw long enough to engage as much of the material as possible without protruding.
The dangers of a screw that is too long are obvious. In cabinetry, a screw that is too long can puncture the adjacent cabinet wall. In roofing, a hex head screw that is excessively long can interfere with insulation or wiring in the attic space. Taking a moment to measure the thickness of the materials being joined and applying the appropriate rule for penetration is a simple step that prevents countless problems.
The "close enough" mindset is the enemy of fine craftsmanship. It is the decision to use a 1.5-inch screw when a 1.25-inch screw is called for, simply because it is what's on hand. While this might seem like a minor substitution, the consequences can be significant.
In finish carpentry, a screw that is even slightly too long can "bottom out," preventing the head from seating properly and leaving a gap between the two pieces of wood. Or it might create a slight bulge on the reverse side of the material, a tell-tale sign of a poor-quality job.
In the context of a drywall screw, length is critical. Standard drywall is 1/2-inch or 5/8-inch thick. A 1.25-inch coarse-thread drywall screw is the standard for attaching 1/2-inch drywall to wood studs. This length provides about 3/4-inch of penetration into the stud, which is sufficient. Using a much longer screw, say 2 inches, is unnecessary, takes longer to drive, and increases the risk of hitting plumbing or electrical wires within the wall cavity.
The selection of screw size is not a matter of approximation. It is a calculated decision based on the principles of mechanical strength and material science. By respecting the importance of both diameter and length, you ensure that every piece of hardware you install is not only holding things together but is doing so with the optimal balance of strength, grip, and finesse.
We have now established that the ideal screw is one that is perfectly matched to its application, has the correct anatomical features, and is sized with precision. However, there is another layer to this decision, one that operates on a chemical and metallurgical level. The fourth common mistake is to ignore the material from which the screw is made and the protective coating applied to it. This choice dictates the fastener's lifespan, its resistance to environmental attack, and its compatibility with other materials. A fastener is not a static object; it is in a constant, slow-motion battle with its environment. Choosing the right material and coating is how you ensure it wins that battle for decades to come.
Most screws used in construction and general assembly are made from carbon steel. Carbon steel is strong and inexpensive, but it has a major weakness: it rusts very easily. To combat this, manufacturers apply a vast array of protective coatings. Understanding the hierarchy of these coatings is key to selecting durable hardware.
At the most basic level is a plain or black phosphate finish. This is a minimal conversion coating that offers very limited corrosion protection. It is primarily used for a standard drywall screw, where the fastener will be immediately covered by joint compound and paint, sealing it from moisture. A black phosphate screw will rust almost immediately if left exposed to the elements.
The next step up is zinc plating (or electro-galvanization). This is the familiar shiny silver or yellowish-blue (yellow chromate) finish seen on much general-purpose hardware. A thin layer of zinc is applied via electrolysis. This zinc layer acts as a sacrificial barrier, corroding before the steel does. Zinc plating is suitable for dry, indoor applications. It can handle some humidity but will not hold up to direct water exposure. A zinc-plated hex head screw, for example, would be fine for assembling an indoor metal shelf but would be a poor choice for an outdoor fence.
For more serious protection, we turn to hot-dip galvanization. In this process, the fasteners are dipped into a vat of molten zinc. This creates a much thicker, more robust, and somewhat rougher metallurgical bond between the zinc and the steel. Hot-dip galvanized hardware is the minimum standard for many outdoor applications, such as decking, framing, and fences, where the hardware will be exposed to rain and moisture.
In recent years, modern polymer or ceramic coatings have become increasingly popular. These are proprietary finishes applied over a base layer of zinc or another plating. They offer corrosion protection that can be several times greater than hot-dip galvanizing, often rated by the number of hours they can withstand in a continuous salt spray test (e.g., 500 hours, 1000 hours). These advanced coatings are common on high-quality deck screws, structural screws, and some types of self-drilling screw used in exterior cladding, providing exceptional longevity in a slim profile.
When even the best coatings are not enough, we must change the base material itself. This brings us to the choice between coated carbon steel and stainless steel.
As mentioned, carbon steel is the workhorse. It is strong, hard, and cost-effective. Its properties can be fine-tuned through heat treatment. For instance, a case-hardened drywall screw has an extremely hard outer layer to cut threads, while its core remains slightly softer to prevent it from being too brittle. The vast majority of screws are carbon steel, relying on a coating for their corrosion protection.
Stainless steel is not a single material but a family of steel alloys containing at least 10.5% chromium. The chromium is the key. It reacts with oxygen to form a thin, stable, and invisible passive layer of chromium oxide on the screw's surface. If this layer is scratched, it instantly reforms, "healing" itself and continuing to protect the steel from rust. This makes stainless steel hardware exceptionally resistant to corrosion.
There are different grades of stainless steel. Type 304 is the most common and is suitable for most outdoor and freshwater applications. For exposure to saltwater or other highly corrosive chemicals, Type 316 stainless steel is the superior choice, as it contains molybdenum, which significantly enhances its resistance to chlorides.
The tradeoff for this incredible performance is cost. Stainless steel hardware is significantly more expensive than coated carbon steel. So, when is it worth it? The answer lies in the application's environment and desired lifespan. For a deck on a coastal property, a boat, or food-grade equipment, stainless steel is the only sensible choice. The higher initial investment prevents the much greater future cost of failure and replacement. For a garden shed in a dry climate, good quality hot-dip galvanized or ceramic-coated hardware is likely more than sufficient.
There is a subtle but destructive phenomenon that can occur when the wrong materials are chosen: galvanic corrosion. This happens when two dissimilar metals are in electrical contact in the presence of an electrolyte (like rainwater). A small electrical current flows between them, and the more "active" or less noble metal corrodes at an accelerated rate.
A classic example is using a zinc-plated steel screw to fasten a copper flashing. In the galvanic series, zinc is much more active than copper. The zinc plating on the screw will rapidly sacrifice itself, and once it's gone, the steel screw itself will begin to corrode quickly, leading to failure. The correct choice would be a copper or bronze screw.
A more common and modern problem involves pressure-treated lumber. The chemicals used to treat wood to prevent rot and insect damage can be highly corrosive to certain metals. Older treated wood used arsenic (CCA), while modern wood uses copper-based chemicals (ACQ, MCA). Placing a standard galvanized screw in modern ACQ-treated wood creates a galvanic cell, with the large amount of copper in the wood causing the zinc coating on the screw to corrode very quickly. This is why building codes and manufacturers now mandate the use of specific hardware for treated wood: either hot-dip galvanized (to specific standards like ASTM A153) or, preferably, stainless steel.
Understanding materials and coatings is about planning for the future. It is a recognition that the forces of chemistry and the environment are constantly at work. By choosing the right material and finish, you are not just selecting a piece of hardware; you are specifying its longevity and ensuring the enduring safety and beauty of your project.
The final, and perhaps most frustrating, mistake is to do everything right—select the perfect screw for the material, with the ideal anatomy, correct size, and proper coating—only to have the connection fail due to improper installation. The best hardware in the world cannot compensate for poor technique. The act of driving a screw is not a brute-force operation; it is a process that requires a degree of finesse and the use of the correct tools. Neglecting this final step can lead to stripped screw heads, stripped holes in the substrate, split wood, or fasteners that are either dangerously loose or over-tightened to the point of failure.
The question of whether to drill a pilot hole is a common point of confusion. A pilot hole is a hole drilled into the substrate before the screw is driven, and its purpose is twofold: it gives the screw a clear path to follow, ensuring it goes in straight, and it removes material to prevent the screw from acting like a wedge and splitting the wood.
With the advent of modern screw designs, like the self-drilling screw, the need for pilot holes has been reduced in many applications. A self-drilling screw, by its very nature, creates its own perfectly sized pilot hole as it is driven into metal. Similarly, many modern wood screws have specialized tips (like "auger" or "self-drilling" tips) and thread designs that significantly reduce the risk of splitting, allowing them to be driven into many softwoods without a pilot hole.
However, the pilot hole is far from obsolete. It remains an essential technique in several key situations:
Forgetting or choosing to skip a pilot hole in these situations is a gamble that rarely pays off. It is a shortcut that often leads to ruined workpieces and weakened joints.
Modern cordless drills and impact drivers are powerful tools. They make driving screws incredibly fast and easy, but that power can be a double-edged sword. Applying too much torque when driving a screw can lead to several problems.
The most common is stripping the screw head. This happens when the driver bit spins in the recess, rounding it out and making it impossible to drive the screw further or, more critically, to remove it later. This is often a sign of using the wrong bit or applying too much speed and not enough downward pressure. A hex head screw or a Torx drive screw is far more resistant to this than a Phillips head.
Another issue is stripping the hole in the substrate. This is especially common in softer materials like particle board, MDF, or softwood. The threads of the screw spin in place, tearing the material fibers until they have nothing left to grip. The screw will just keep spinning without getting any tighter. This connection is now useless. The only remedies are to use a larger diameter screw, or to fill the hole with wood glue and dowels and start again.
The solution to both problems is torque control. Most modern drills have an adjustable clutch, usually a numbered collar behind the chuck. This is one of the most useful but most underutilized features of the tool. The clutch is designed to disengage the drive at a set torque level, producing a clicking sound. By starting at a low setting and increasing it until the screw is driven flush and snug, you can drive every screw to the perfect, consistent depth without any risk of over-driving and stripping. Using the clutch is the mark of a skilled and careful craftsperson.
The final point of contact between you and the hardware is the driver bit. Using a worn, damaged, or incorrectly sized bit is a recipe for frustration. The fit between the bit and the screw's drive recess should be snug and positive, with minimal wobble.
The classic Phillips head (#2 Phillips is the most common size for construction screws) is notorious for "cam-out"—the tendency of the bit to ride up and out of the recess under torque. This is what causes stripped heads. It was, in part, a deliberate design feature for early automated assembly lines to prevent over-tightening.
A PoziDriv bit looks similar to a Phillips but has extra small ribs between the main wings. It provides a much better engagement and is less prone to cam-out but requires a PoziDriv screw. Using a Phillips bit in a PoziDriv screw (or vice versa) will result in a poor fit and a high likelihood of stripping.
The modern champion of torque transfer is the Torx or star drive. Its six-point star design provides numerous points of contact, allowing for high torque application with virtually no risk of cam-out. This is why it has become the drive of choice for premium hardware like deck screws and structural screws.
Similarly, a hex head screw requires the correct size of socket or nut driver. Using a loose-fitting socket or an adjustable wrench can round off the corners of the hex head, making it impossible to drive or remove.
The condition of the bit is also important. A worn bit will not engage properly. Driver bits are consumable items. If you find your bit is slipping, replace it. The small cost of a new bit is trivial compared to the time and effort required to extract a screw with a stripped head. Proper installation is the final act of respect for the hardware and the project, ensuring that all the careful planning that came before is realized in a strong, clean, and durable connection.
The primary differences lie in their thread design and head shape. A chipboard screw typically has a very coarse, deep thread and a straight shank, designed to get a strong grip in the composite material of particle board or MDF. A drywall screw has a bugle-shaped head to avoid tearing drywall paper. Drywall screws come in two main thread types: coarse for wood studs and fine for metal studs. Using a drywall screw in chipboard will often result in poor holding power.
While you technically can drive a self-drilling screw into wood, it is not the ideal hardware for the application. The drill point is designed to excavate metal or hard plastic, not displace wood fibers. The fine machine threads that follow the drill point are not designed for optimal grip in wood. A proper wood screw or chipboard screw with coarse threads will provide significantly better pull-out strength in any wood-based material.
Choose stainless steel hardware for projects in highly corrosive environments or where long-term aesthetics are paramount. This includes coastal areas with salt spray, applications involving direct contact with saltwater (like boats), projects using certain corrosive pressure-treated woods (like ACQ), and in food-grade or sterile environments. For general outdoor construction in most inland climates, high-quality hot-dip galvanized or modern polymer-coated hardware is often a sufficient and more cost-effective choice.
The number (e.g., #1, #2, #3, #4, #5) on the point of a self-drilling screw refers to the length of the drill flute. A higher number indicates a longer flute, which means the screw is capable of drilling through a thicker gauge of metal. For example, a #2 point might be suitable for light gauge steel studs, while a #5 point would be required to drill through thicker structural steel. It is crucial to match the point number to the thickness of the metal you are fastening.
No, it is not always necessary, but it is often good practice. For softwoods, many modern screws with specialized tips can be driven without a pilot hole, especially if you are not close to an edge. However, you should always use a pilot hole when: 1) driving into any hardwood (oak, maple, etc.), 2) fastening near the end or edge of a board to prevent splitting, and 3) using large-diameter screws like lag screws.
They look similar, but a PoziDriv head has four additional small lines or "tick marks" in the recesses between the main cross slots. This design provides better engagement with a PoziDriv bit, reducing the chance of the driver slipping out ("cam-out"). They are not interchangeable. Using a Phillips driver in a PoziDriv screw (or vice versa) will lead to a poor fit and increase the risk of stripping the head.
This usually happens for one of three reasons. First, you may have been driving into a very hard material (like dense hardwood or metal) without a properly sized pilot hole, causing excessive torque on the screw. Second, the screw itself may have been of poor quality or the wrong type for the job; for instance, using a brittle drywall screw for a structural application can lead to snapping under shear load. Third, excessive, uncontrolled torque from an impact driver can also shear a screw head.
The journey through the world of hardware, specifically the humble screw, reveals a landscape of surprising complexity and elegant engineering. We began with the simple premise that the choice of a fastener is a critical decision, and we have seen how this choice ripples through every aspect of a project's life. To ignore the substrate, to be blind to the language of a screw's anatomy, to approximate its size, to disregard its material makeup, or to be careless in its installation is to invite weakness, failure, and frustration. These are not academic concerns; they are the practical realities that separate durable, professional work from that which is temporary and flawed.
Cultivating an empathy for the fastener—understanding the forces it must resist and the environment it must endure—is the philosophical shift that underpins true craftsmanship. It is the practice of seeing the bugle head of a drywall screw not as just a shape, but as a purpose-built solution to prevent tearing. It is recognizing the aggressive, coarse thread of a chipboard screw as the perfect voice to speak to the loose structure of particle board. It is appreciating the miniature drill bit on the end of a self-drilling screw as a marvel of efficiency.
As we move forward in our projects, let us carry this deeper understanding. Let us pause before reaching into the box and ask the right questions. What am I fastening? What forces are at play? What is the environment? The screw is not the most glamorous component of any build, but it is arguably one of the most vital. By treating its selection with the seriousness it deserves, we ensure that the things we build are not just assembled, but are brought together with integrity, strength, and an intelligence that will stand the test of time.